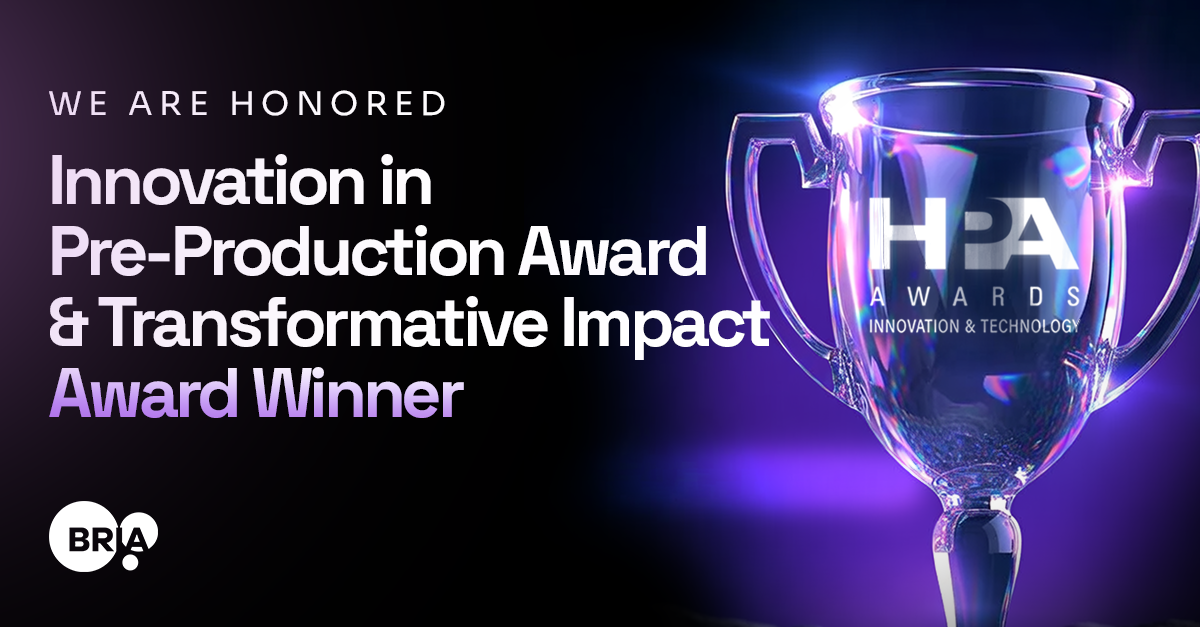
Skip to the main content.


Explore Our Models on Hugging Face
Try Now

Create Your First API Key
Sign Up

Need More Help?
Contact Us


Explore Our Models on Hugging Face
Try Now

Create Your First API Key
Sign Up

Need More Help?
Contact Us

16 min read

Altering ControlNet Input: A Guide for Input Adjustment

Altering ControlNet Input: A Guide for Input Adjustment
30:24
 
TL;DR

In this blog, we’ll guide you through the technical process of modifying ControlNet’s architecture to handle more complex inputs, such as concatenated masked images and masks. Following this step-by-step guide will teach you how to adapt ControlNet’s existing structure to support inputs beyond the default settings, allowing for greater flexibility in your diffusion model projects. We’ll cover everything from the rationale behind these architectural changes to detailed code modifications. Whether you're new to ControlNet or looking to fine-tune it for a specific use case, this blog will equip you with the necessary knowledge and tools to customize ControlNet effectively.


Introduction

This guide aims to provide a comprehensive walkthrough on modifying ControlNet to accommodate more complex input types, such as masked images and custom channels. Whether you're a developer, researcher, or simply interested in pushing ControlNet's boundaries, this guide will equip you with the technical understanding to make precise architectural changes. By the end of this process, you'll be able to adapt ControlNet for specific use cases and learn how to implement these modifications step by step. If you're interested in diving deeper into the theory behind ControlNet, be sure to check out this blog post.

A Few Words About ControlNet  

ControlNet is a platform for training diffusion models that generate images based on both textual descriptions and a conditioning image.

ControlNet comes “off-the-shelf,” ready to handle inputs like depth maps, edge maps (think Canny), pose diagrams, color grids, and other models and templates in Hugging Face.

I’m guessing you landed on this blog because you want to use ControlNet and have a very specific goal in mind.

If the community has already created the ControlNet model you need, that would be awesome! Just grab it and start experimenting.  But what if the ControlNet model you need doesn't exist yet?

What if you want to use a specific conditioning image that no one has thought of before?

https://i.giphy.com/media/v1.Y2lkPTc5MGI3NjExbmtjeTl4M3RmYnViZTl2Y3FvMmlhdDljanI3MGllZ2JkbzhpcGQxZCZlcD12MV9pbnRlcm5hbF9naWZfYnlfaWQmY3Q9Zw/QBA3nFqgBkFB9EwieD/giphy.gif


What if you use a specific conditioning image that no one has thought of before?

Ah, here’s where the plot thickens—but this is where it gets exciting (and fun!). This is your chance to get creative and work some magic!

What’s the catch? To do complex things, you need to understand the ControlNet platform deeply. Sure, things might get complex, but that’s the fun part, right?

Whether you're here for a complex deep dive or just a quick win, this blog covers you. 

Technical Basic Details About ControlNet You Should Know Before

Getting Started

The ControlNet platform consists of four main components:

  1. Input Component to the Foundation Text-to-Image (T2I) Model (blue) – This component passes a noisy image and text prompt to the foundation model.
  2. Foundation T2I Model (orange) – This model receives the noise and text (and tensors from the control net) processes them, and generates a new image as output.
  3. Input Component to the Control Model (brown)– This component passes a conditioning image to the control model, such as a depth map or an edge map (like Canny).
  4. Control Model Component (purple) – This part processes the conditioning image through internal layers (of the Transformer) and produces a tensor. This tensor is then passed through the Control-UNet layers and integrated directly into the convolution and attention layers of the Foundation T2I model.


Four main components consisting of the ControlNet platform

When it comes to technology, I love to dig deep—exploring the inner workings of these models, popping the hood, peeking behind the scenes, and tearing apart the engine (have I run out of metaphors yet?). I’ve dedicated an entire blog to this kind of exploration, focusing more on the theory behind ControlNet. It offers a different perspective that helps explain the reasoning behind the changes we’re about to make.

But this blog? It’s going to be more technical. Here, I’ll guide you through how to tweak ControlNet to fit your needs, and we’ll dive into implementing changes to replace backgrounds in images.

So, let’s roll up our sleeves, grab the wrench (or keyboard), and get technical. Let’s begin!

Why change the architecture? 

If you’ve landed on this blog, you probably already have a reason in mind. But let me give you a few examples. Sometimes, your product requires input types that the basic ControlNet isn’t designed to handle. For instance, instead of just a single-channel input, you may want to combine multiple inputs—like a color image plus a mask or a combination of a color image, a depth map, and an edge map. These inputs are more complex, often involving four or more channels (I’m not talking about connecting multiple ControlNets; I’m talking about changing the input structure for a single ControlNet!). To handle such inputs, you’ll need appropriate data for training and adjustments to the platform and code to accommodate this new structure.

For our example, let’s focus on something concrete. I’ll show you how to tweak the ControlNet platform to accommodate five input channels, as we did for the inpainting use case in this blog. This is what I did with it, but the possibilities are endless. With a similar approach, you could train models and develop products for all kinds of applications.

Ready-to-Use Code and Models from Bria

Before we jump into the technical details, it’s worth mentioning that we’ve already implemented these changes at Bria. Our team has prepared ready-to-use code with all the necessary modifications, and we’ve trained control-net models (with unique input sizes) on large, legally-sourced datasets. If you want to fine-tune these models, you can download them from Bria’s website in Hugging Face and get started immediately. Please note that the models are completely free for academic use. Fill out this form, and we will send it to you.

As for diffusers, you’re probably familiar with them. It’s the go-to library for working with diffusion models so that I won’t bore you with the details. Because it’s such a standard in the community, we at Bria ensured all our models were fully compatible with Diffusers. Whether you're developing or running models in production, it’s the backbone we rely on to make your work easier.


Technical Part 

What’s Going On in the ControlNet Training Code?


ControlNet Training Code

Let’s start by looking at the script Diffusers provided for training ControlNet: train_controlnet_sdxl. So, what’s happening here? This script is designed to train the ControlNet model using the diffuser library. Before we jump in and make changes, let’s take a moment to understand what the code is doing—because, trust me, you don’t want to dive in without knowing what’s under the hood (debugging is fun... said no one ever).

debugging is fun... said no one ever
https://giphy.com/gifs/ZO7Y7ssNfYEN4LQYCj


This script trains the ControlNet model, which is pretty standard stuff. You’ve got the usual suspects: importing the necessary libraries, setting up some parameters, configuring the optimizer and scheduler, and handling the data with the DataLoader.

Since this is a ControlNet training script, it also loads the various models you’ll need, like the foundation model, VAE, and ControlNet itself. The VAE is the standard one you’re used to, and for the ControlNet-UNet, you’ve got options: either use a sub-copy of the foundation model or bring in a control-specific UNet and fine-tune that as suggested here.

Then comes the main event—the training loop. This is where the script adds noise to the latent variables, uses ControlNet for conditioning, and calculates the loss to guide the control model’s learning (or at least give it a good push in the right direction).


Controlnet.py

The training script calls the
ControlNetModel, which defines the model's architecture and functionality, including the components needed to handle conditioning images and incorporate them into the image generation process. When the ControlNetModel is imported into the training script, it loads this model's architecture.

Essentially, the architecture code defines the model, while the training script performs the actual model training, making them work together. I know I’m not breaking any new ground here for most of you, but it's essential to be aligned here - because we will change these two scripts.

The ControlNetModel also defines key classes in ControlNet, including ControlNet Conditioning Embedding, which processes conditioning images and integrates them into the model.


ControlNet Conditioning Embedding:

This class is part of the ControlNet model and implements a small neural network that converts conditioning images into a latent format that the model can learn from and use during image generation. It plays a crucial role in embedding conditions into the training model. In the diagram attached above, I called it "The Transformer" because it transfers the condition input from the pixel space to the latent space.


The Modular Architecture Behind ControlNet

The code contains the entire architecture of the ControlNet model, from the basic definition of the different models to how they work together to form the whole “control net platform”. ControlNet is an extension of the foundation Diffusion model that allows conditioning images to influence image generation, enabling more precise control over the final result.

The architecture is modular, enabling the integration of different building blocks, flexibility in choosing various embedding methods, and the ability to customize layers to meet the specific requirements of any application.

In essence, this code provides the foundation for all the necessary modules for ControlNet and serves as the overall architecture for managing the diffusion process and the associated conditions. It aims to generate images that align with the given input conditions.

Technical Part 2: What Needs to Be Changed


This section will explain the reasoning and logic behind the necessary changes in the ControlNet code to accommodate more complex inputs, such as masked images. Understanding these concepts will help you better grasp the modifications we’ll implement later. You can refer to this blog post for a more detailed explanation of the theory behind these changes. The detailed technical implementation of these changes will follow in Technical Part 3.

We updated the code to fit our specific needs—specifically, to change the size and type of input.

Now, we’re going to do two things:
First, I’ll link to the updated ControlNet Python file where these changes have already been implemented. You can simply replace the script I’m sharing here with your existing architecture script, and it should work pretty smoothly.

Second, I’ll explain the changes in detail. If you can follow along with the steps in this blog, these explanations will help you implement the modifications yourself. This is actually the preferable method since I don’t know which version of ControlNet you’re working with or what updates may have been made since I implemented these changes.

What We’re Changing:

  1. Change the input size
  2. Modify stride size
  3. Add a custom embedding layer
  4. Create custom data
  5. Encode the  custom data with VAE
  6. Update the control image


Breaking It Down: Why We’re Making These Changes


Overview of ControlNet Modifications

In this section, we’ll briefly overview the general modifications needed to adapt ControlNet to handle more complex inputs, such as masked images and masks. These changes will allow ControlNet to process multi-channel inputs, enabling more application flexibility. We’ll also explain why these changes are necessary and how they improve the model's performance. This overview will set the stage for the detailed technical steps that follow.

1. Why Change the Input Size?

We want to change the input size because (in our example) we’ll be inputting a masked image + mask, which means we need to increase the input size to 5 channels.

 If it’s a masked image, you’re probably thinking, "Wait, isn’t that 4 channels? RGB + mask?"

Well, not quite. It starts with four channels, but when the masked image passes through the VAE, it gets encoded into four latent channels, and we’ll add one more channel for the mask.

Let’s visualize this with the simple diagram “In painting Training input: RGB Image and Mask Concatenation in ControlNet.” In the top row of the diagram, we see an RGB color image concatenated with a corresponding mask, generated using Bria's RMBG 1.4 model (alpha mask). This combination transforms the input into a 4-channel representation. In the bottom row, we observe the conditioning input (the masked image) process in ControlNet, both during training and inference. The masked image is passed through the VAE, and its output—containing four channels—is then concatenated with the resized mask, resulting in an actual input of 5 channels.

In painting Training input: RGB Image and Mask Concatenation in ControlNet 

Top row: An RGB image is concatenated with a mask, turning it into four channels.  Bottom row: The conditioning image (masked image) goes through the VAE, producing four channels. After concatenation with the resized mask, the input expands to 5 channels.

To sum up, we want to use the masked image latent as a control input and the concatenated mask, so the input size should be five channels instead of 3.

Note: ControlNet usually takes inputs like depth maps or Canny edges. Although these seem like single-channel inputs (e.g., grayscale depth or edge maps), they’re repeated three times, which is why, in the training code you’re familiar with, the conditioning default input size is set to 3. What’s happening is that it’s receiving a repeated single channel generated by the depth map or Canny algorithm

2. Why Modify the Stride Size

Let’s first remind ourselves that the control input needs to "meet" the diffusion model at some point, meaning the sizes must match up. Also, diffusion models operate in the latent space, where the size is much smaller than the pixel space (typically reduced to 128x128 instead of 1024x1024 in pixel space).

In the default implementations of ControlNet, the input size is typically 1024x1024, which is quite large, so it needs to be downsampled. This is done with the stride. In the original code, the stride is set to 2, because we need to reduce the size of the tensor somehow.

Why We’re Changing the Stride: Preparing for VAE Integration in Step 5

But here’s what we’re doing differently: instead of feeding a 1024x1024 image directly into ControlNet, we’re passing it through the VAE first, and the output from the VAE (which is already downsampled) is what we’ll feed into ControlNet. Since the VAE output is already tiny, we don’t need to downsample it again, so we’re changing the stride to 1. I’ll go into more detail about the VAE process later in this document.

Brief Explanation of VAE

Before we dive into the technical aspects, it's crucial to understand how the Variational Autoencoder (VAE) works and why it's central to this process. The VAE converts input images into a compressed latent space, allowing diffusion models to work efficiently. In the context of ControlNet, the VAE encodes both the original and masked photos, which are then processed by the model. The VAE ensures that the inputs are appropriately scaled and aligned with the architecture of ControlNet. If you’d like to explore the VAE and its role in generative AI more, check out this detailed blog.

3. Add a custom embedding layer

We’ll add a custom embedding layer for the conditioning images in the ControlNet model, overriding the default embedding initialization.

In the original version of the code, when the ControlNet model is loaded (either from a UNet or a pre-trained model), a default embedding layer, which I referred to earlier as the "Transformer," is created to process the conditioning images. This "Transformer" is crucial in converting (transforming) conditioning images into a latent format that the model can efficiently use during diffusion.

This modification will create a new custom embedding layer to handle the conditioning images, replacing the existing "Transformer" embedding layer. We’ll also specify the number of output channels for this layer and define the input size accordingly.


4. Create custom data

Preparing the Data: Masked Images and Masks

The first step to effectively replace a background in an image using diffusion models is creating a mask that separates the foreground object from the background. Using Bria's Background removal model, we generate a masked image with a black background (And the front object remains unchanged). This mask is then paired with the masked image, forming a concatenated input that will be fed into the ControlNet model. It's essential to prepare the data carefully, as the quality of both the mask and the masked image significantly influences the model's output. 

This data preparation step is essential to ensure the mask is aligned with the masked image, allowing the VAE to encode them properly. It's important to note that this modification won’t be made in the controlnet.py script, which handles the architecture, but rather within the training script, where we manage the data flow and transformations. Preparing the data accurately here is key to the success of the model.

This is the specific example I’ve chosen to guide you through in this blog, for a more detailed explanation of the data preparation process, you can check out the previous blog post [here]. If you’re working with a different input type, make the necessary adjustments for your use case.


5. The Role of the VAE in Image Encoding

Now we’re getting to what we discussed earlier—if we want to reduce the dimensions of our input using the VAE, it’s time to implement that. The VAE is a great fit here, both from a technical and theoretical standpoint. And if you’re in the mood to dig deeper into the theory behind it, I’ve got you covered—check out this blog, where I explain everything in detail.


6. Update the control image

We need to adjust the input to ensure that ControlNet can handle the concatenated masked image and mask. First, we resize the mask to match the dimensions of the latent (the compressed representation from the VAE). Then, we concatenate the resized mask with the masked patients, creating a control image that includes both elements. ControlNet is now ready to process this updated control image, ensuring both inputs are properly integrated during the image generation process.

Technical Part 3: Let’s Change

The previous section covered the logic and reasoning behind the required modifications to adapt ControlNet for more complex inputs. Now, we’ll move on to the practical application of these changes. Here, you’ll find the full code implementation to help you apply the changes in your own projects tailored to your specific needs.

1. Implementing Input Size Changes in Code  (in the model architecture  script)

We’ll update the conditioning_channels parameter from 3 to 5 in the ControlNetConditioningEmbedding class.

Inside this class, ControlNetConditioningEmbedding, conditioning_channels defines how many input channels will be passed into the first convolution layer (conv_in) and the subsequent layers within the embedding process.

Note: The conditioning_channels parameter appears twice in the code—once during the initialization of the ControlNetConditioningEmbedding class and once during the initialization of the ControlNetModel class. We need to change it specifically inside ControlNetConditioningEmbedding.

Example of how to change the code:כ

class ControlNetConditioningEmbedding(nn.Module):
 
    def __init__(
        self,
        conditioning_embedding_channels: int,
        conditioning_channels: int = 5,
        block_out_channels: Tuple[int, ...] = (16, 32, 96, 256),


2. Modifying the Stride Size in the Architecture

In the ControlNetConditioningEmbedding, in the second conv layer: 
 
class ControlNetConditioningEmbedding(nn.Module):
 
...
 
        for i in range(len(block_out_channels) - 1):
            channel_in = block_out_channels[i]
            channel_out = block_out_channels[i + 1]
            self.blocks.append(nn.Conv2d(channel_in, channel_in, kernel_size=3, padding=1))
            self.blocks.append(nn.Conv2d(channel_in, channel_out, kernel_size=3, padding=1, stride=1))


3. Adding a Custom Embedding Layer for Conditioning Images

 
if args.controlnet_model_name_or_path:
    logger.info("Loading existing controlnet weights")
    controlnet = ControlNetModel.from_pretrained(args.controlnet_model_name_or_path)
else:
    logger.info("Initializing controlnet weights from unet")
    controlnet = ControlNetModel.from_unet(unet)
 
## Add:
controlnet.controlnet_cond_embedding = ControlNetConditioningEmbedding(
                conditioning_embedding_channels=320,
                conditioning_channels=5,
            )


4. Create custom data (in the training script) 

To prepare the custom data for inpainting, we’ll create a masked image where the background (or the area that needs to be inpainted) is black, represented by a value of 0. This ensures that the inpainting model focuses on the correct areas. By using the image_mask, we can selectively mask out the background:

masked_images[:,image_mask < 0.5] = 0  # mask background

This step properly prepares the data, allowing the model to handle the inpainting task with the desired focus on the masked areas.

Note that image_mask needs to come from the data loader while  masked_images can be created on the fly.

5. Encoding and Scaling the Latents Using the VAE

 (in the training script)

To encode the original and masked images using the VAE, we first pass the original image through the VAE to convert it into its latent representation. This latent representation remains unchanged and is later used with added noise for the diffusion process as part of the T2I Foundation model (which stays unchanged and is not modified). This latent feeds both the UNet and ControlNet models. Next, we do the same for the masked image, converting it into its latent space. This step is specific to our use case, as the masked image serves as the conditional input for ControlNet. Both the original and masked patients are scaled by the VAE's scaling factor to ensure they fit correctly within the model's architecture.

 
# Encode the original image into the latent space
latents = vae.encode(
    pixel_values.to(vae.dtype)
).latent_dist.sample()  # Output dimensions: [1, 4, 64, 64], latent representation of the original image
 
# Scale the latents to match the model's expected input size
latents = latents * vae.config.scaling_factor
 
# Encode the masked image into the latent space (specific to our use case)
masked_latents = vae.encode(
    masked_images.to(vae.dtype)
).latent_dist.sample()  # Output dimensions: [1, 4, 64, 64], latent representation of the masked image
 
# Scale the masked latents to ensure they align with the model's architecture
masked_latents = masked_latents * vae.config.scaling_factor


6. Updating the Control Image for ControlNet

 (in the training script)

To fully integrate the mask and the latent (i.e., the VAE output), we need to adjust how we process the control image. First, we resize the mask to match the dimensions of the latent space, and then we concatenate the resized mask with the masked latent. This step ensures that ControlNet receives the proper input and can effectively handle both the latent and the mask.

Here’s the code to do this:

## Add:
 
# Resize the mask to match the latent dimensions
masks = torch.nn.functional.interpolate(masks, size=(1024 // 8, 1024 // 8))
 
# Concatenate the latents and the resized mask
controlnet_image = torch.cat([masked_latents, masks], dim=1).to(dtype=vae.dtype) 


At this point, the mask has been resized to match the latent space (as we’re working with a reduced resolution in the latent space) and concatenated with the masked latent. The result is a control image (controlnet_image) that contains both the latent and the mask, ready to be passed into ControlNet.

Next, we use this updated control image in the ControlNet forward pass:

# Resize the mask to match the latent size
masks = torch.nn.functional.interpolate(masks, size=(1024 // 8, 1024 // 8))
 
# Concatenate the latent and the mask
controlnet_image = torch.cat([masked_latents, masks], dim=1).to(dtype=vae.dtype)  # bs, 5, 64, 64
 
# Forward pass in ControlNet with the updated control image
down_block_res_samples, mid_block_res_sample = ControlNet(
    noisy_latents,
    timesteps,
    encoder_hidden_states=batch["prompt_ids"],
    added_cond_kwargs=batch["unet_added_conditions"],
    controlnet_cond=controlnet_image,
    return_dict=False,
)

In this part of the code, we pass the concatenated controlnet_image (which includes both the latents and the mask) as the controlnet_cond argument in ControlNet’s forward pass. This ensures that ControlNet processes both inputs correctly, allowing the latent and the mask to work together to influence the image generation process effectively.


Tips for Avoiding Mistakes When Modifying ControlNet's Architecture

While working on this project, we encountered a few pitfalls that could save you time if you learn from our experience. Here are some key insights:

Using Only the Mask or Only the Masked RGB Image

Initially, we experimented with creating a control network using the default architecture (similar to Canny-ControlNet) by inputting only the masked RGB image. While this approach didn’t work well for our specific use case, it might work for others. In our scenario, we found that providing both the mask and the image was essential for giving the model enough information to effectively "guide" the generation process. Combining these inputs offered significantly better control and results, but you might see different outcomes depending on your use case.

Correctly Modifying the `conditioning_channels` Parameter.

The `conditioning_channels` parameter appears twice in the code—once during the initialization of the `ControlNetConditioningEmbedding` class and once during the initialization of the `ControlNetModel` class. Modifying this parameter specifically in the `ControlNetConditioningEmbedding` class is essential. Changing it elsewhere will not have the desired effect.

Modifying the `stride` in the Convolutional Layer

When working with the convolutional layers in `ControlNetConditioningEmbedding,` it's essential to pay attention to where you modify the `stride.` The architecture can be confusing since there are several convolutional blocks. 

Update the `stride` in the second convolutional layer within each block. Here's the specific line where the change happens. This adjustment ensures that the input size matches the latent from the VAE. Be careful to apply this stride modification consistently across all necessary layers to ensure the input flows correctly through the architecture.

Optimize Performance with Mixed Precision

When working with large models like ControlNet, using mixed precision can significantly speed up training and reduce memory consumption without sacrificing accuracy. If you use compatible hardware (like NVIDIA A100 GPUs), ensure that mixed precision is enabled by setting the model to run with mixed_precision="bf16." This will allow the model to perform computations using 16-bit floating point precision, optimizing memory usage while maintaining the necessary accuracy for critical operations.

Wrapping It All Up

By now, you've gained insight into the inner workings of ControlNet and learned how to adapt it for more complex inputs and custom use cases. From adjusting the input size to integrating a custom VAE process, you've got a solid foundation to tackle more advanced modifications and optimizations. Remember, experimenting and fine-tuning are critical, and don't be afraid to make mistakes along the way—they’re part of the learning process. With these tips and techniques, you can create a more versatile and powerful ControlNet for your unique applications. Good luck, and happy coding!

And hey, before you dive back into your code, here's a friendly reminder: Bria’s offerings are more than just our Foundation models. We've got the complete package- it is a whole open source: architecture setups, code, weights—everything you need. Once you sign up on our platform, everything is wide open. Plus, you're not going at it alone. You’ll have guidance from our Solution team, R&D, and me. So, don't hesitate to reach out—we're here to help!

If you're in academia, sign up here, and it's all yours (free!). If you're in the industry—sign up here (and yeah, you’ll need to pay), but once you do, everything’s open for you too. We’ve got you covered either way, so jump in, and let’s build something unique together!

Disclosure

Full disclosure: The author is the VP of Generative AI Technology at Bria, holds a Ph.D. in Computer Vision and has many years of experience in generative AI. She has extensive expertise in training models (both fine-tuning and from scratch), writing pipelines, and conducting practical, theoretical, and applied research in various areas of computer vision

A Novel Approach To Training Diffusion Model Inpainting

A Novel Approach To Training Diffusion Model Inpainting

In this insightful blog post, we dive into the world of AI model development with a focus on quality data and effective training strategies. The...

Read More